2021年3月12日星期五

How to use Autel MK808 Erase BMW ABS/DSC Warning Light Error codes

 Car model and year: BMW 3 Series F31 2016 .
Purpose: Turn off the ABS/DSC Warning Light
Tool used: Autel MaxiCOM MK808

Procedure

Plug the connector into the OBD2 port, let’s go to Autel MK808,


Diagnostics >> BMW >> Manual selection >> 3 Series >> F30/F31/F35 >> Yes

Bmw 3 Series F31 2016 Abs Dsc Warning Light Reset Via Autel Mk808 (1)

Bmw 3 Series F31 2016 Abs Dsc Warning Light Reset Via Autel Mk808 (2)

Bmw 3 Series F31 2016 Abs Dsc Warning Light Reset Via Autel Mk808 (3)


Turn the ignition off, please wait...


Turn the ignition on, please wait...


It is communicating with the ECU, and it’ll give us a big list of a system that will allow us to diagnose. I need to find the ABS/DSC system.


Diagnosis >> Control unit >> Chassis

Bmw 3 Series F31 2016 Abs Dsc Warning Light Reset Via Autel Mk808 (4) Bmw 3 Series F31 2016 Abs Dsc Warning Light Reset Via Autel Mk808 (5) Bmw 3 Series F31 2016 Abs Dsc Warning Light Reset Via Autel Mk808 (6)


ABS - DSC(ABS-Dynamic stability control) >> Read codes


It’s telling one fault code here: 48082A - wheel speed sensor(WSS): right rear voltage supply circuit short to battery(+)


It means that there is a fault with the rear right ABS sensor. It is a very common failure on BMW’s actually, what I had done was to change the ABS sensor over, and put a new one in.

Bmw 3 Series F31 2016 Abs Dsc Warning Light Reset Via Autel Mk808 (7) Bmw 3 Series F31 2016 Abs Dsc Warning Light Reset Via Autel Mk808 (8)

Bmw 3 Series F31 2016 Abs Dsc Warning Light Reset Via Autel Mk808 (9)

So go back to clear codes,

ESC >> Erase codes


DTCs and freeze data will be deleted, press “Yes” to continue.


Codes have been successfully erased. Press “OK” to finish.


The ABS warning light has gone!

We can return to “Read codes” again to verify as well.

Bmw 3 Series F31 2016 Abs Dsc Warning Light Reset Via Autel Mk808 (10) Bmw 3 Series F31 2016 Abs Dsc Warning Light Reset Via Autel Mk808 (11)

Bmw 3 Series F31 2016 Abs Dsc Warning Light Reset Via Autel Mk808 (12)

This is using Autel MK808 Diagnostic Tool to reset ABS for a BMW 3 series F31, it can also works on BMW 3 Series E36, E46, E90, E91, E92, E93, F30, F35, BMW 4 Series F32, F33, F36, BMW 5 Series E39, E60, F07, F10, F11...etc.

http://blog.auteldiag.com/bmw-3-series-f31-2016-abs-dsc-warning-light-reset-via-autel-mk808/

2021年3月10日星期三

Autel IM508 add key for Mercedes W207 2008-2014 with XP400 Pro

 This is a demonstration of how to add a smart key for Mercedes Benz C250 W207 2008-2014 with Autel MaxiIM IM508+XP400 Pro programmer on bench.


Toolsprepare:


Procedure:
Connect all devices, go to IM508 scanner to start:


Save EIS Data
IMMO >> Accept >> Benz >> Automatic selection >> Enter VIN / Read >> OK >> Yes >> 2008-2014 >> Control unit >> EIS tools >> Read EIS data >> OBD >> On bench >> Auto scan >> OK >> OK >> Yes >> OK


Add Key
Add key >> On bench >> W207 >> OK >> Begin

Put the original key close to XP400 Pro programmer remote reception position, press any button on the key.

Insert the original key into XP400 Pro IR keyhole, press “OK”.

Is the ignition key a smart key?
No >> OK

Read ignition key information success.


Put the original key close to XP400 Pro again, press any button on the key.

Insert the blank key into XP400 Pro IR keyhole, press “OK”.

Is there a key password?
No >> OK >> Begin

Note: After the key password is calculated, it may be required to insert and remove the ignition key for multiple times before it can start the vehicle.
Press “OK”.


Insert the original key into EIS and wait for 5s...
Press “OK”.

Pull the original key out, press “OK”.

Insert the original key into EIS again and wait for 2s...
Press “OK”.

Please confirm whether the key can be turned to ON position.
If not, remove the key and try again until it can be turned to ON position.
Press “OK”.

Note: if operate in a car, please pay attention to whether the instrument panel is illuminated when the key is turned to ON position. Try again if the key cannot be turned to ON position.


Pull out the original key from EIS, insert it into XP400 Pro IR keyhole again.
Press “OK”.

Acquiring data and calculating password...
Wait for 10-30 mins...

Press “OK” when succeed to get password.

Insert the original key into EIS, wait for 30s...

Password calculation completed! Press “OK”.

Insert the blank new key into XP400 Pro IR keyhole, press “OK”.

Key addition completed, press “OK”.


Check The Key
  1. Insert the new key into EIS.
If the red indicator lamp on the key lights up and goes off, the key learning is successful.
If the red indicator lamp stays lit, try inserting and removing the key for several times.
If still not working, the key addition failed.
  1. Turn ignition on and check if the vehicle can be started normally.
If the vehicle not started normally, the key addition failed.


The new key does work normally.
Key programming has done!
 
Video demo: 


2021年3月9日星期二

Autel AutoLink AL519 vs. Autel AL619


Are you still looking for a basic OBD2 scanner? Either Autel AutoLink AL519 or Autel AutoLink AL619 can be an ideal option. For DIY’ers and beginners, they will find it worth the price.


Q: Which scanner is better?

We have listed a comparison table below:


Autel AL519 vs. AL619

ItemAutel AutoLink AL519Autel AutoLink AL619
ImageAutel AutoLink AL519Autel AutoLink AL619
DisplayTFT color display (320 x 240 dpi)TFT color display (320 x 240 dpi)
Dimensions (L/W/H)175 mm (6.91’’) x 96.6 mm (3.80’’) x 37 mm (1.46’’)199 mm (7.83’’) x 104.5 mm (4.11’’) x 37.5 mm (1.48’’)
OBD2 protocol(s)CAN, ISO 9141, J1850 PWM, J1850 VPW, KWP2000, ISO2000KWP2000, ISO2000, ISO 9141, J1850 PWM, J1850, CAN
ConnectivityVia cableVia cable
Live data
Read & erase DTCs
Retrieve the VIN
Freeze frame
I/M readiness status
C.A.N. capability
Datastream
Data graphing
Vehicle information
On-screen DTC definitions
Code lookup function on tool & printing capabilities
DTC cause/tips
Bi-directional testing + Advanced Mode 6
I/M readiness key 
ABS diagnose 
SRS diagnose 
Check engine light
Oil light reset
EVAP codes
UpdateDoesn’t support updates nowLifetime free updates
LanguageEnglish, French, SpanishEnglish, German, French, Spanish, Portuguese, Polish, Italian, Dutch, Russian


Differences


Functions

  1. The most significant difference between AL519 & AL619 is ABS/SRS diagnosis. AL619 does support read and clear ABS/SRS warning light while AL519 does not support.
  2. Only AL519 features with unique patented one-click IM/readiness key.
  3. AL619 supports lifetime free updates while AL519 doesn’t support now.
  4. AL619 supports 9 languages while AL519 only supports 3 languages.


Price

AL519 is cheaper than AL619, which is much cost-effective for those who do not require too many additional functions.


Similarities


Functions

Both have most OBD2 basic functions such as read/erase codes, live data, freeze frame, retrieving I/M readiness, etc. Both can check engine light, reset oil light, perform EVAP tests, etc.


Size

Both have similar sizes and weights, small and compact, easy to carry and handle.


Connection

Both only support connecting by cable.


Vehicle Coverage

Both work on most 1996 and newer OBD2&CAN vehicles.


Conclusion

Autel AL519 scan tool is recommended for beginners who do not require too many advanced features and spend too much money on it. It has the basic OBD2 functions to meet their needs.


Autel AL619 scan tool is recommended for car repair enthusiasts who require ABS/SRS diagnosis function. Even though it is can’t be comparable to a professional mechanic’s scanner, you will find it worth the extra cost.

https://www.auteldiag.com/


2021年3月4日星期四

Autel AL519 Erase Toyota Sienna 2004 CE P0356 Error Success


Problem
Check engine warning light caused by P0356 error:
There is a check engine light coming on the Toyota Sienna 2004 CE, so I wanna use the Autel AutoLink AL519 scan tool to find out why it caused.

Plug the connector into OBD2 port,
Press “OBDII/EOBD” to link vehicle with device.

Autel AL519 will automatically store data from diagnosis last time.
Press “Yes” to erase.
autel-al519-fix-toyota-sienna-p0356-error-01
autel-al519-fix-toyota-sienna-p0356-error-02
Read codes >> Stored codes

It tells there was a fault code P0356: Ignition coil F, primary/secondary circuit.
So that is why caused check engine light.
autel-al519-fix-toyota-sienna-p0356-error-03
autel-al519-fix-toyota-sienna-p0356-error-04

autel-al519-fix-toyota-sienna-p0356-error-05


Having known the reason, go back to clear codes.
Erase codes >> Yes >> Yes

Erase done!
autel-al519-fix-toyota-sienna-p0356-error-06
autel-al519-fix-toyota-sienna-p0356-error-07

autel-al519-fix-toyota-sienna-p0356-error-08

autel-al519-fix-toyota-sienna-p0356-error-09


Solution (what I did for reference)
  1. Remove either the battery terminal positive or negative;
  2. Remove the spark plug 6, you can Google where it is;
  3. Check the connection of coil, make sure it was not cut;
  4. Using brake cleaner to clean spark plug, because dirty smoke won’t make it work well;
  5. Put everything back to original position.

Turn ignition on, the check engine light has gone!
Problem was solved!

Thanks to Autel AL519, I finally found out & solve fault code P0356 for Toyota Sienna, the annoying warning light no more came back again.
 

2021年3月1日星期一

How to use Autel Chrysler 12+8 Adapter

Using Autel FCA Chrysler 12 + 8 adapters working with Autel tools like MS906BT/ IM608, you can bypass Security Gateway Module (SGM) on Chrysler, Dodge, Jeep, Fiat, Alfa 2018+ vehicles to perform active testing, special functions, reading, and erasing codes, Program fob key etc.
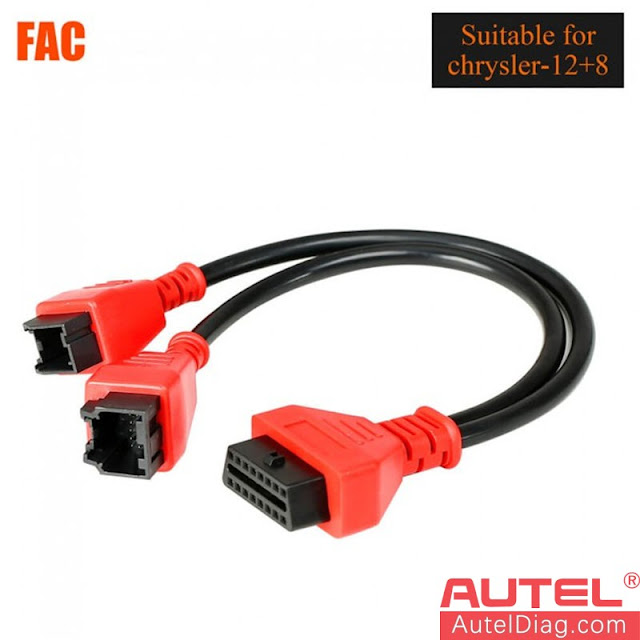
Autel Chrysler 12+8 Adapter


On newer vehicles like the 2019 Jeep Wrangler and many other Fiat Chrysler vehicles 2018 and up now come equipped with the SGM. As more and more vehicles become equipped with internet access, the OE manufacturer needed a way to be able to prevent outside intrusion. At the same time, it made it harder for the aftermarket tools to be able to access these systems and do day-to-day repairs that are necessary.


What can Autel 12+8 cable do?

The good news is Autel has offered a solution: FCA 12+8 Adaptor, which allows to:

  1. Read/clear codes;
  2. Perform active test;
  3. View generic & manufacturer live data;
  4. Perform TPMS OBDII relearn;
  5. Coding and adaptations with MaxiSys tablet tools MS906BT+;
  6. ADAS calibrations (requires MaxiSys ADAS software).
  7. Can be used with Autel MaxiIM IM508IM608


How to install Autel 12+8 cable?

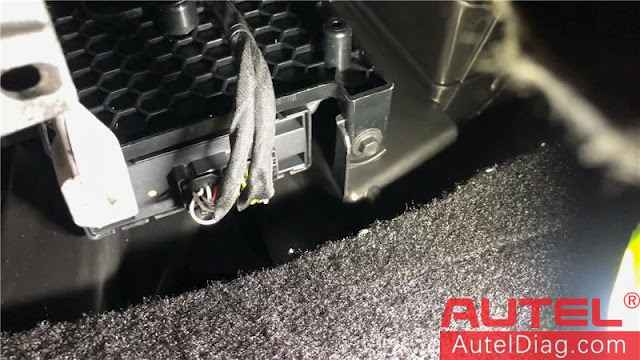
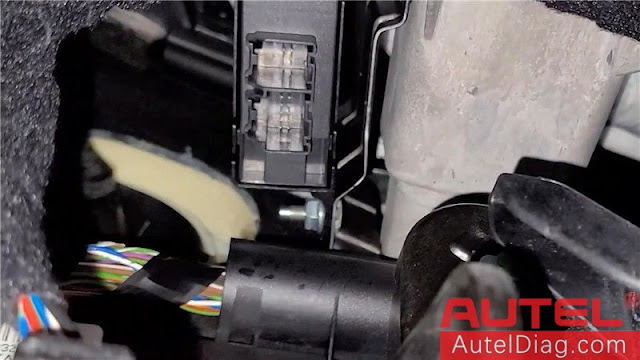
  1. Find out the security gateway module. Generally, it is installed below the dashboard.
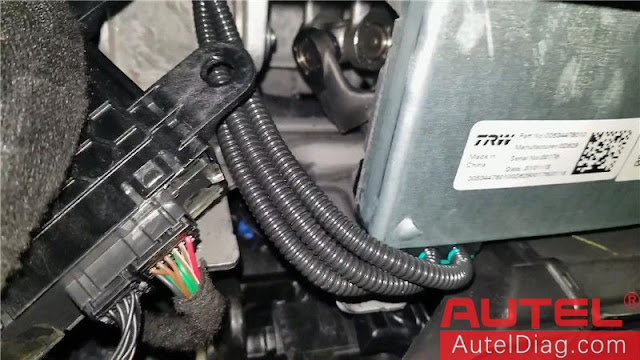
How to use Autel Chrysler 12+8 Adapter 01

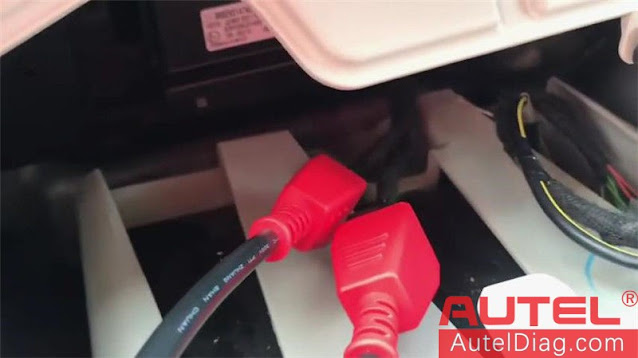
  1. Remove the connector, and plug the 12+8 adapter instead.


How to use Autel Chrysler 12+8 Adapter 02

How to use Autel Chrysler 12+8 Adapter 03


  1. Connect the other side to OBD adapter of diagnostic scanner.
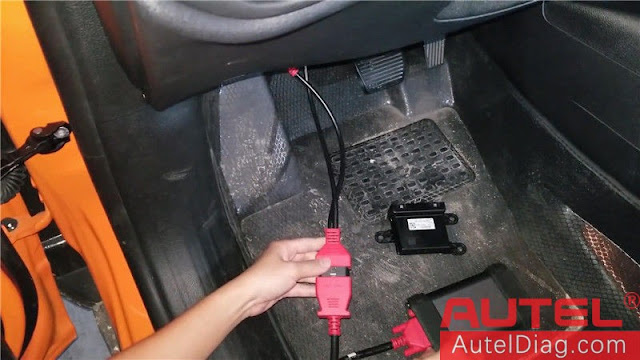
How to use Autel Chrysler 12+8 Adapter 04


Locating Autel 12+8 cable on a 2018 Chrysler Pacifica


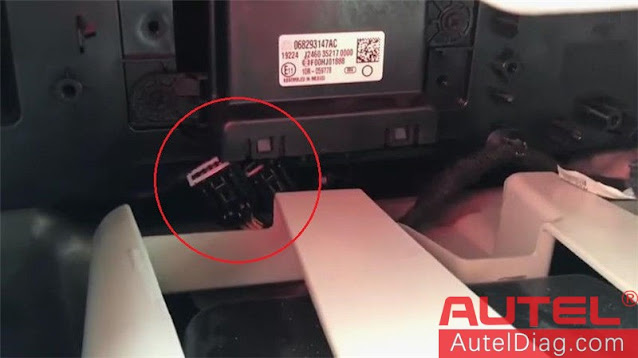
Some people say the SGM is behind the video, it is not actually. It is inside the dashboard. You got to pull the panel out, you could just use like a peak tool or like a plastic one would be better, thus you won’t scratch off the sides. And the panel is connected with clips that you should remove.
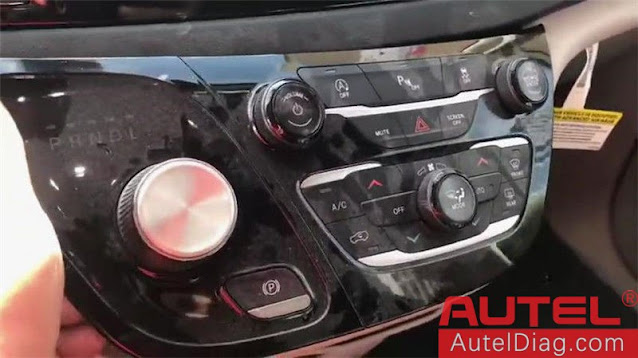
 How to use Autel Chrysler 12+8 Adapter 04

 How to use Autel Chrysler 12+8 Adapter 05

You’re gonna see a module right over here. Unplug the 2 plugs here, now you can plug the Autel Chrysler 12+8 connectors. The other side can connect to any OBD connector from Autel MaxiSys scanners(eg. MS908S Pro) to start reading & writing codes on this car.
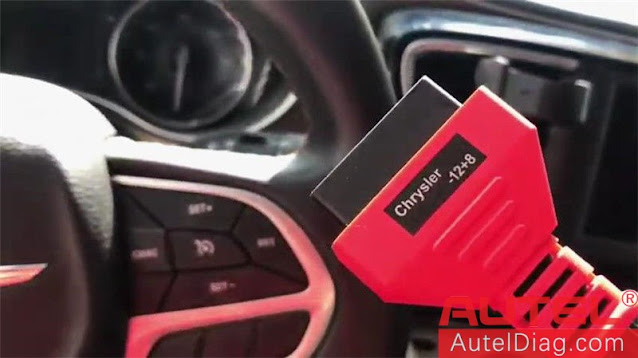
 How to use Autel Chrysler 12+8 Adapter 05

How to use Autel Chrysler 12+8 Adapter 06

 How to use Autel Chrysler 12+8 Adapter 07

Locating Autel 12+8 cable on a 2018 Dodge Durango


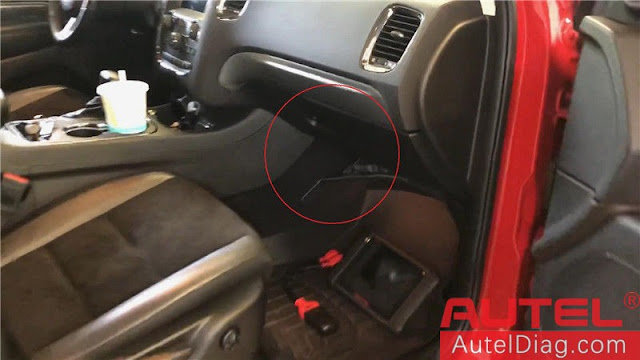
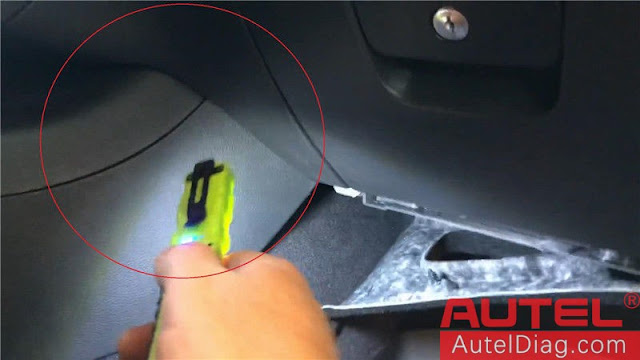
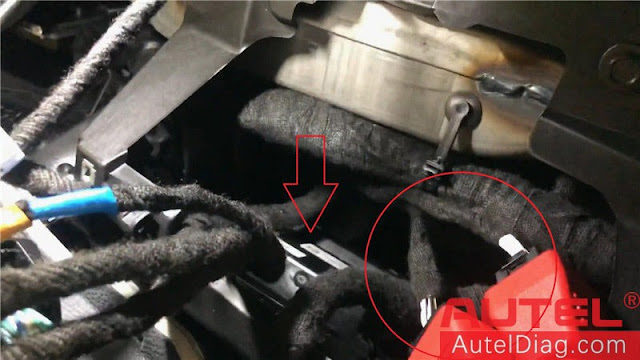
The Chrysler requires a 12+8 adapter which is not as easy as the OBD2. The SGM is right in the circle I drew here. Remove the trim panel first, just one clip nice and easy. It is really tight to pull out and on the backside towards the driver’s side of the car.


There are no labels or anything that show you that’s the SGM connectors. But that’s definitely it and that’s what we had to do to get them plugged with 12+8 cable and post-scan done. So just want to share it.
How to use Autel Chrysler 12+8 Adapter 08


How to use Autel Chrysler 12+8 Adapter 09

 How to use Autel Chrysler 12+8 Adapter 10

Locating Autel 12+8 cable on a 2018 Dodge Challenger


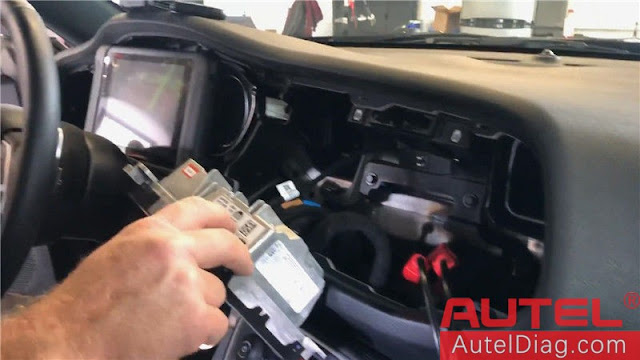
The SGM is right behind the radio, I had to pull this. Let the radio hang and then if you come up in here. The Autel Chrysler 12+8 connectors goes into this black box down here. You have to reach in and push to release and slide them out.


Now you can hook up the 12+8 cable. It took me a while to find it, it wasn’t even obvious once I got the radio out.
 How to use Autel Chrysler 12+8 Adapter 11

 How to use Autel Chrysler 12+8 Adapter 12

Locating Autel 12+8 cable on a 2019 Jeep Renegade


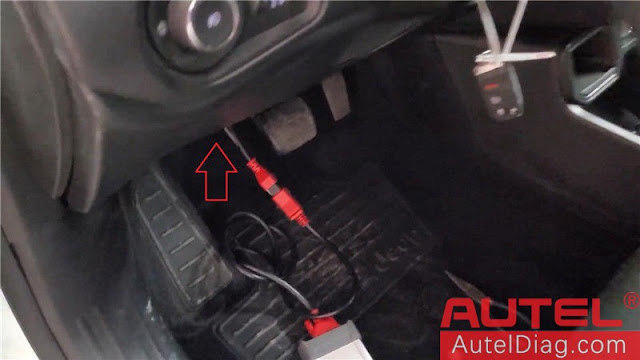
To scan this car, you can’t use the OBD port, you actually have to connect this Chrysler 12+8 adapter to the gateway module connectors. As you can see, the gateway module is up there, I have it disconnected. So I just pulled the harness that was actually fairly easy. I thought I was gonna have to take apart some stuff but no, just pull out the connectors. And plug this 12+8 adapter into it. And that does the trick.


After that, connect it to the OBD adapter of Autel MaxiSys Elite, now I can scan.

How to use Autel Chrysler 12+8 Adapter 13

How to use Autel Chrysler 12+8 Adapter 14

 How to use Autel Chrysler 12+8 Adapter 16

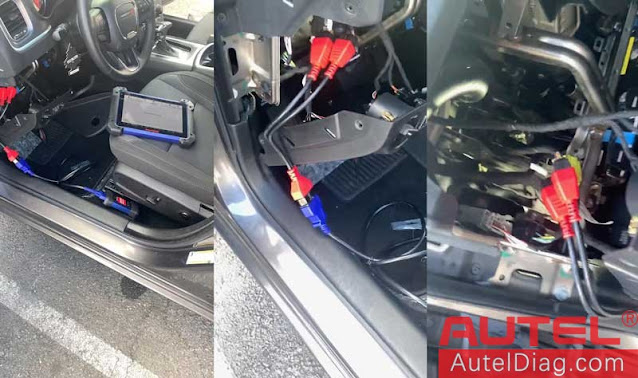
Locating Autel 12+8 cable on a 2019 Dodge Charger

Autel IM608 works with 12+8 cable to program key fob on a 2019 Dodge Charger
How to use Autel Chrysler 12+8 Adapter 17

More any questions please contact us.

E-mail: Sales@AutelDiag.com
Skype: Auteldiag.com
WhatsApp: +86-13372689373

https://www.auteldiag.com/